
All people and enquiries shown are fictional. Illustrations combine genuine 2.8-series WordPress captures with labelled Premium sample screens. Labels and layout can vary with WordPress, language and edition. They are not customer activity or promises of measured results.
Install and get ready
Publish on a website you control. Your domain, WordPress installation and hosting keep the profile available.
- Use WordPress 6.0 or later and PHP 8.1 or later. Ask your host to confirm these versions. Keep a current backup before installation or updates.
- Obtain the official ZIP for your edition. In WordPress, open Plugins > Add New Plugin > Upload Plugin, choose the ZIP, then Install Now and Activate. Do not upload a source/developer archive or an extracted folder through Upload Plugin.
- In Free, you can skip the optional Freemius account connection and use the card features. Premium requires its separate package and a valid licence for the paid features.
- Check Settings > Permalinks. Public profile routes need a working non-Plain structure and server rewrite rules. On a new site, Post name is an option; on an existing site, retain its established structure.
- Open vCard Pro in the admin sidebar. Create one test card and verify its public profile and contact download before adding your team.
- The plugin is active and the vCard Pro menu opens.
- The first public profile loads without a 404.
- You can download a VCF and confirm it in your contact app.
Create a useful first card
Give visitors the information they need to contact you, with a portrait and company identity they recognise.
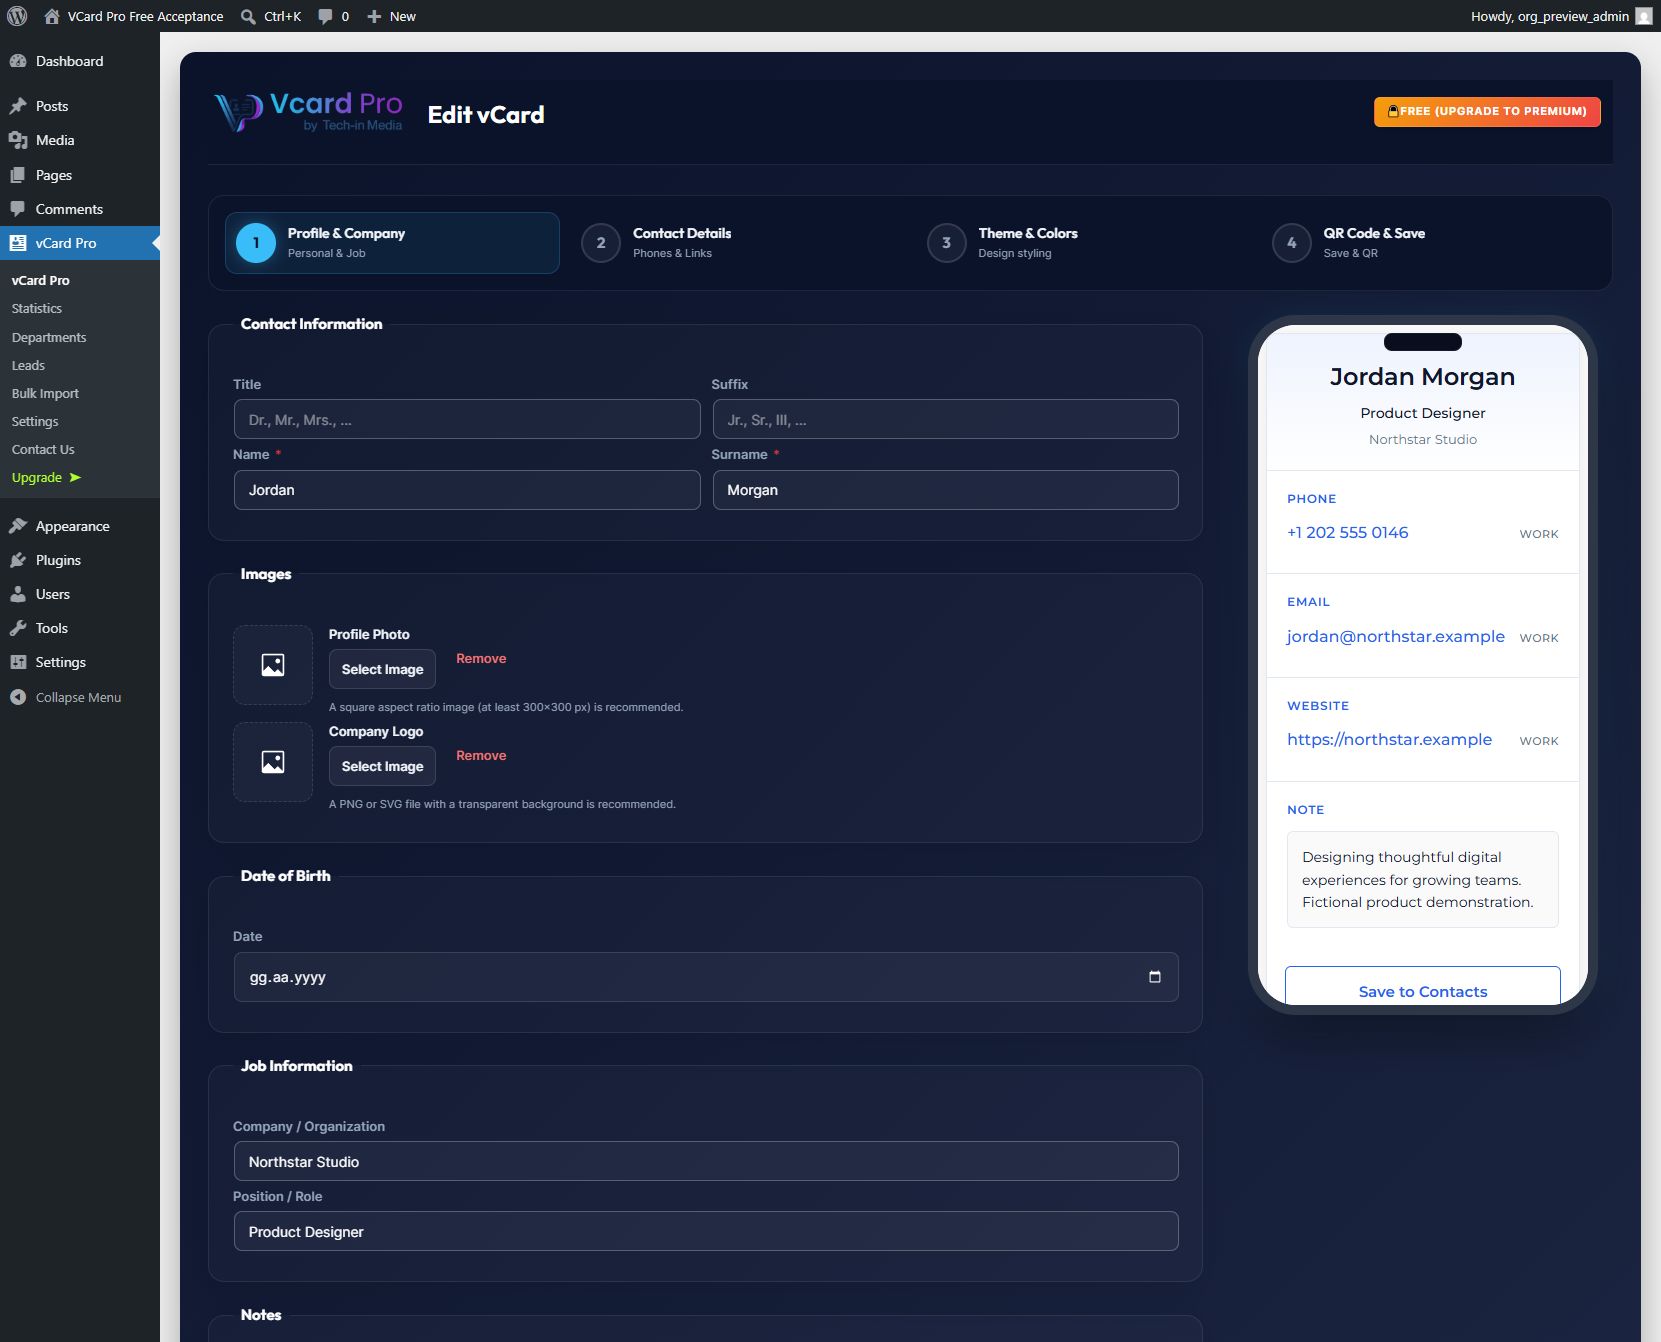
- Choose vCard Pro > Add New Card. In Profile & Company, enter the person's name and surname, optional title/suffix, company and position.
- Choose a portrait and company logo from the WordPress media library. Use images you own or are licensed to publish. A square portrait of at least 300 x 300 pixels works well.
- Use Contact Details for phone numbers, email addresses, websites, addresses and social links. Add a separate entry for each number or address and choose its type.
- Only enter information intended to be public. Notes and other VCF fields can be included in the downloaded contact even if a theme does not show every field.
- Continue through Theme & Colors and QR Code & Save, then save. Open the saved profile from the card list to check the result.
Choose a theme and keep your URL
Match the card to your business while keeping a consistent profile address for people who already have your QR code.
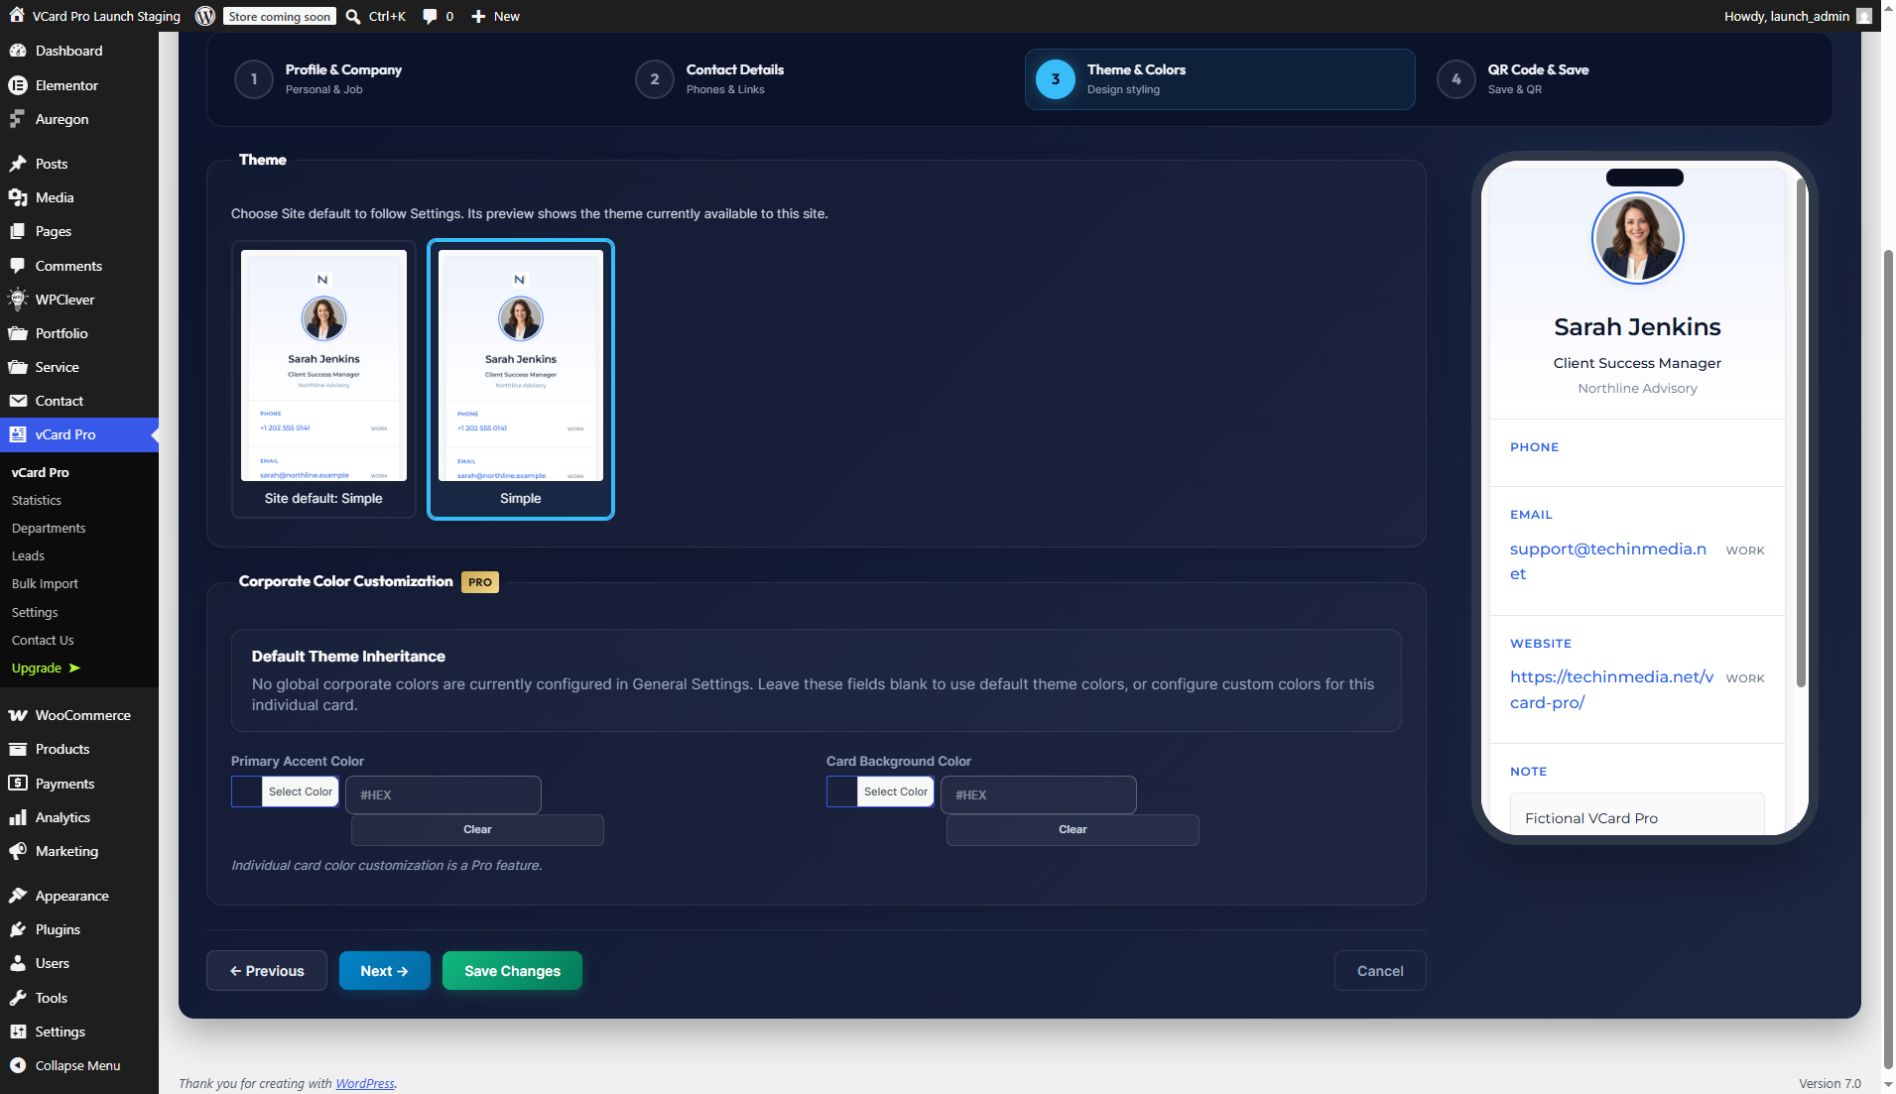
- In the card editor, open Theme & Colors. Select Simple, Classic or Mint Minimal in Free, or one of the 30 designs with Premium access.
- Review the live preview and any colour controls available for the chosen theme. Save, then check the profile on a narrow mobile screen and on desktop.
- A card using the Default option follows the default theme configured in Settings. Select a specific theme when you want that card to keep its own design.
- Editing a person's name preserves an existing card slug. A new card receives an automatically generated slug; changing its displayed name later does not regenerate it.
Share the profile, QR and contact
One profile link works in a message, email signature or printed QR. Visitors choose when to save your details.
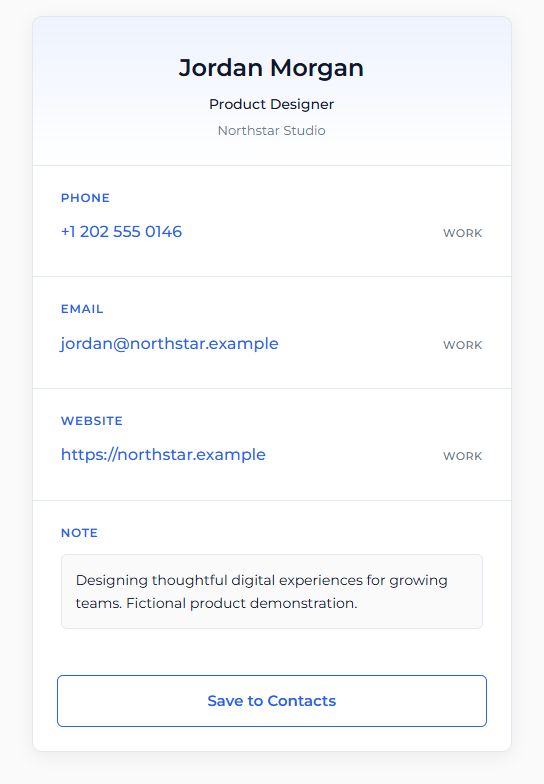
- From the card list, open the profile URL. Copy that public address when sharing a link; do not share an admin editing URL.
- Use QR Code & Save for the QR output. Free provides basic PNG; Premium adds SVG output, colours and a centre logo.
- Keep strong contrast, a clear light margin and a modest centre logo. Test the final exported code with a phone camera before printing, including at the intended print size.
- Scan the QR and confirm that it opens the correct profile. Use Save to Contacts to download a VCF. Your phone or contact application asks how to import or save it.
- Recheck the profile and VCF after important data or hosting changes. A downloaded contact is a copy; changing the website does not automatically update someone's address book.
Put a card inside an existing page
Add a contact card to an About page, staff biography or service page without sending visitors away first.
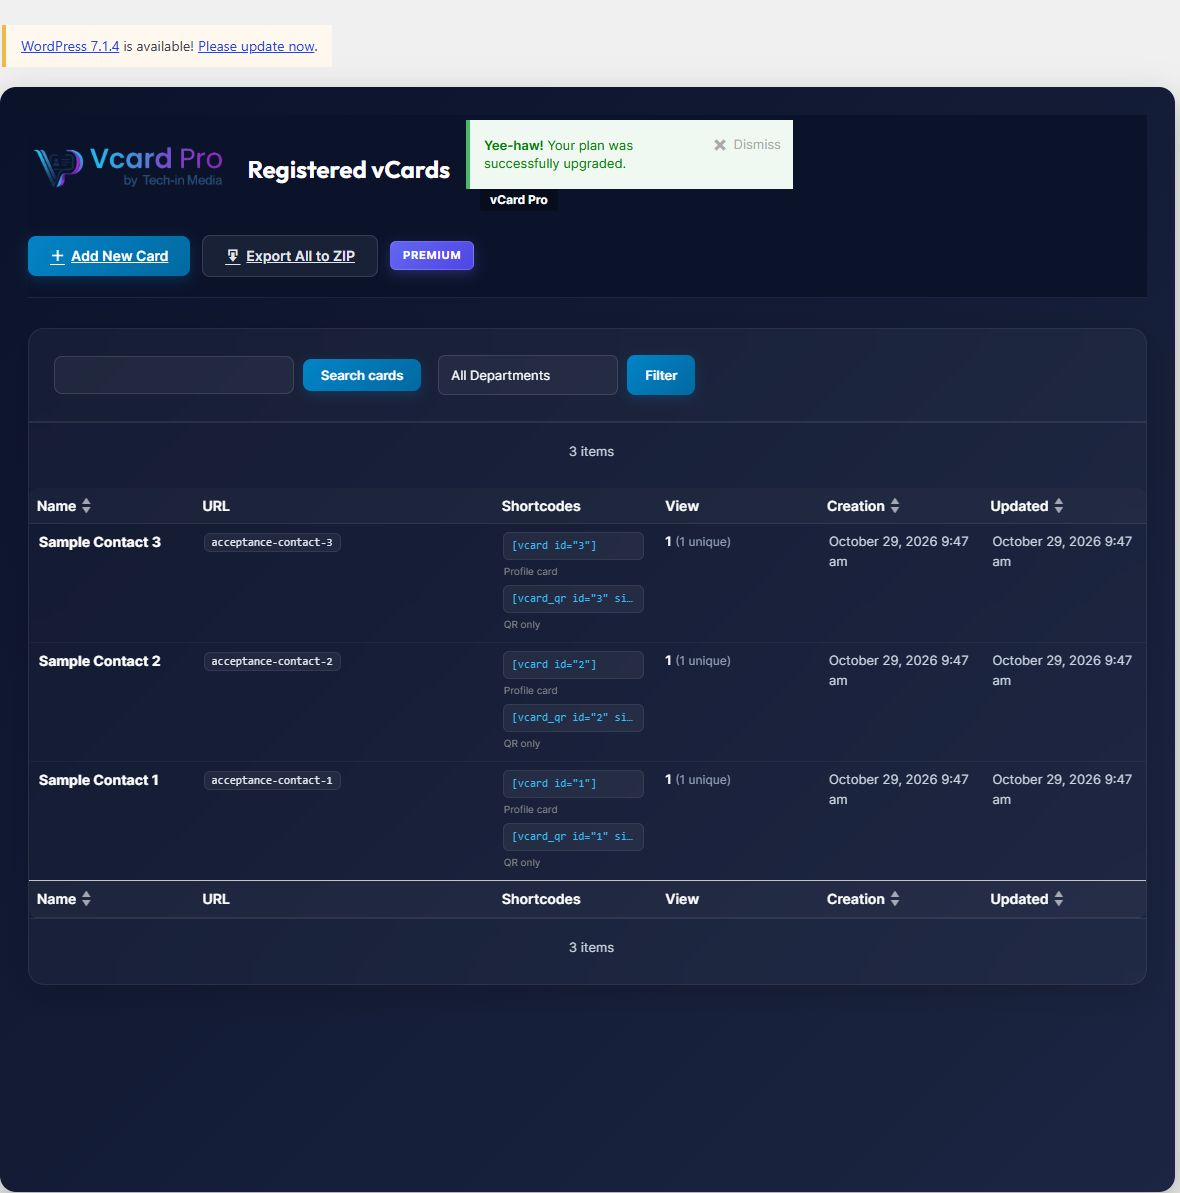
[vcard id="12"][vcard slug="alex-morgan"]- Find the saved card in vCard Pro. Copy the Profile card code from its Shortcodes column. Replace the example 12 with that card's actual ID.
- WordPress block editor: edit the destination page, add a Shortcode block, paste the code and preview the page. Update or publish the page when ready.
- Elementor: add its Shortcode widget, paste the same code and preview the page. Use the shortcode-aware widget rather than a Code block that displays the text literally.
- Alternatively, use the saved card slug as shown above. Use one identifier. A positive id takes precedence over slug; an invalid id does not fall back to the slug.
- Preview the whole page on mobile and desktop. The card renders inline using its saved theme; your WordPress theme or page-builder styles can affect the surrounding layout.
Embed just the QR code
Place a scannable profile QR beside your own page content, in a staff directory or a print-friendly contact section.
[vcard_qr id="12" size="200"][vcard_qr slug="alex-morgan" size="240" format="png"][vcard_qr id="12" size="300" format="svg"]- Copy the QR only code from the card list. Paste it into a Shortcode block or Elementor Shortcode widget, just as you would for the full card.
- Set size to the displayed square size in pixels. The default is 160; accepted sizes are limited to 80 through 1000. Values outside the range are clamped.
- Use format="png" for Free. SVG requires Premium; a Free request for SVG falls back to PNG. Unknown format values also fall back to PNG.
- The QR targets the card's public profile URL, not the page containing the shortcode. Premium uses the card's QR colours and company logo through the QR service.
- Add any clickable text link beside the QR yourself. The QR shortcode outputs an image, not a download button or a linked image.
Understand card engagement
See which cards are receiving attention and which contact actions people choose, then improve the information they find.
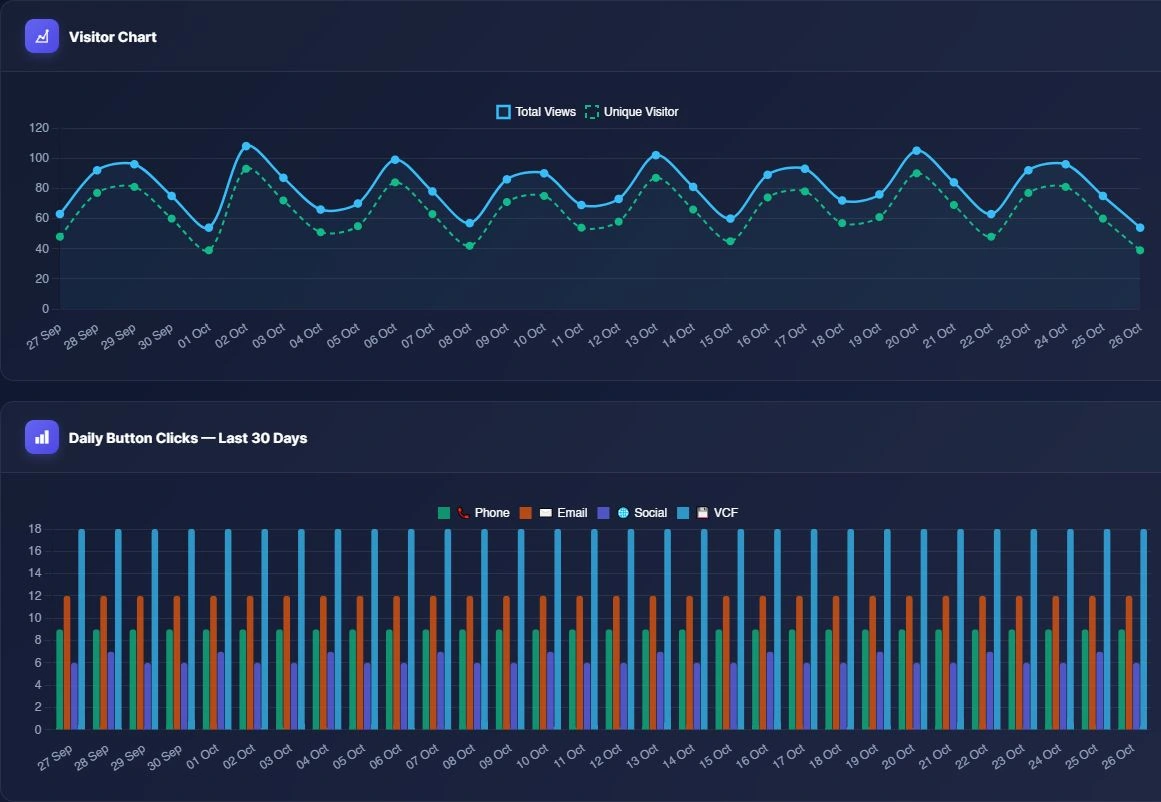
- Open vCard Pro > Statistics. Review the date-range controls and the summary of profile views and contact-action clicks.
- Use the per-card performance table and available sorting to compare cards. Read phone, email, social and VCF action breakdowns in their displayed context.
- Use the Statistics CSV export for a spreadsheet copy of the displayed performance information. Store the file appropriately.
- Make a controlled visit and click to understand how your setup records activity. Exclusions, caching, repeat visitors and privacy settings affect interpretation.
Receive and manage enquiries
Let a visitor leave a message from a card, then review the enquiry in WordPress and follow up through your normal workflow.
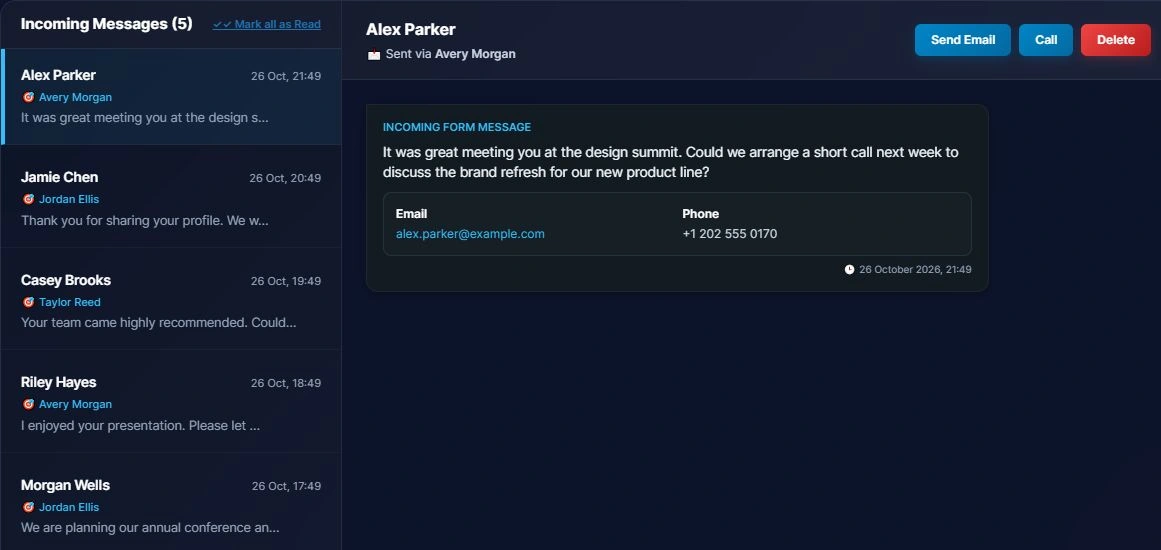
- Review the lead-capture controls in vCard Pro Settings and enable the form for your intended use. Check the public card to confirm which form the visitor sees.
- Configure the consent text and optional anti-spam settings where appropriate. If you use Cloudflare Turnstile, configure your own valid site settings and disclose that service in your privacy information.
- Submit a clearly labelled test enquiry to your own site. Open Leads to inspect the related card, contact details, message and available management actions.
- If email notifications are enabled, verify your configured recipient and the site's WordPress mail delivery. Also check Junk; a saved lead alone does not prove the notification arrived.
- Only configure a webhook when you intend to send lead information to that destination. Test it with fictional data and account for that service in your privacy notice.
Organise a team
Group people by department or branch so a growing card library is easier to manage.
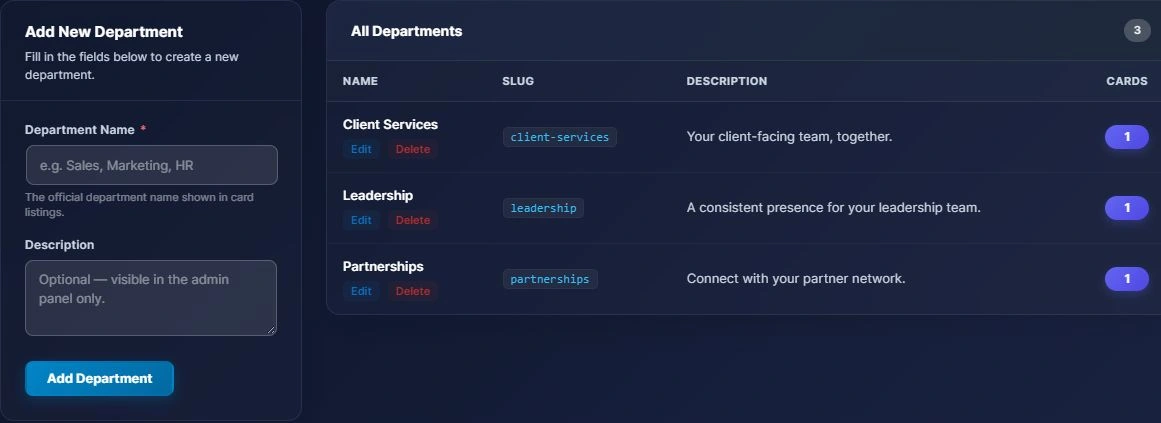
- Open vCard Pro > Departments and create the department or branch structure you need. Use names that will make sense to the people managing the cards.
- In a card's Contact Details, select its department. Review the saved card after assigning shared or inherited branch information.
- Use the department filter in the main card list to find the relevant people.
- For bulk creation, prepare a small CSV sample first and verify how the import maps department and branch data before importing the whole team.
Import cards and export QR codes
Reduce repetitive data entry and prepare QR assets for a team while retaining a checkable source of contact information.
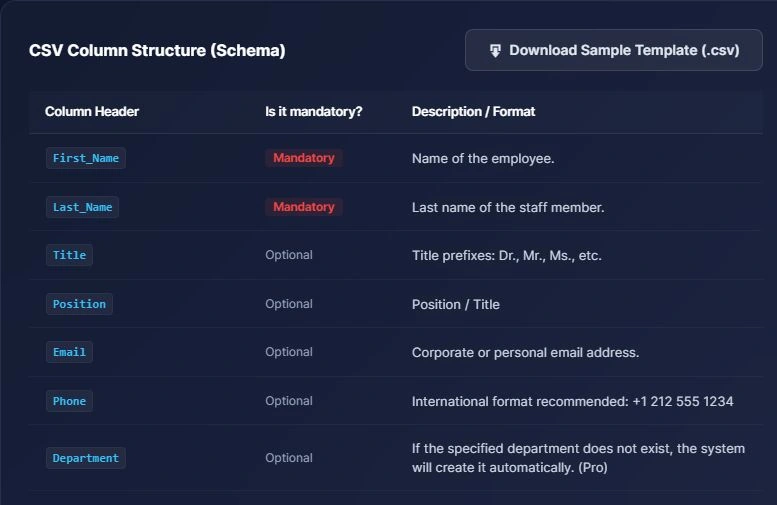
- Back up the website, then open vCard Pro > Bulk Import. Use the current screen's CSV instructions and field mapping rather than guessing column names.
- Start with a small, fictional or authorised sample. Check names, email and phone fields, theme choices, departments and branch inheritance in the resulting cards.
- Do not assume a repeated import updates existing people instead of creating new records. Inspect the result before repeating a batch.
- Use Export All to ZIP on the card list for bulk QR output. Unzip locally and verify the profile destinations and the final artwork before handing files to a printer.
Premium access and updates
Connect the purchased edition to the correct site and receive the plugin updates included in your licence.
- Use the customer account or delivery instructions associated with your authorised purchase to obtain the Premium ZIP. Keep licence details private.
- Back up the site. Deactivate Free before activating the separate Premium package, so two editions are not active together. Existing card data is retained by the plugin.
- Follow the normal Freemius licence activation screen for your purchase and check that Premium features are available. Stay within your plan's website allowance.
- For an update, use WordPress's normal plugin update action when offered. WordPress can also perform background updates when you opt in and its cron, filesystem and loopback checks work.
- After updating, inspect a saved card, its original QR destination and its VCF. If delivery or activation fails, contact support with the version and error description, not your password or licence key.
Keep published cards dependable
Protect the links people already have and fix common setup issues without starting over.
- Profile returns 404: confirm the card exists, WordPress uses non-Plain permalinks and your server applies rewrite rules. On an existing non-Plain setup, save the established permalink settings; do not casually choose a new URL structure.
- Shortcode is visible as text: use a Shortcode block or a shortcode-aware widget, and confirm VCard Pro is active. Empty output: copy the correct ID or slug from the same site's card list.
- Changes are not visible: save the card and clear the relevant page/CDN cache. Open the public profile in a private window. A downloaded VCF is not a live-synced contact.
- QR does not scan: try the original PNG/SVG, restore clear contrast and margins, and test at the final size on a physical phone. Confirm the target domain is online.
- An update or licence check fails: inspect WordPress Site Health and ask the host to check valid HTTPS certificates, outbound HTTPS, permissions and cron. Do not disable SSL verification to work around the issue.
- A notification is missing: check Leads first, then the configured recipient, WordPress mail transport and Junk. Do not resend real customer enquiries repeatedly as a test.
- Support: support@techinmedia.net
- Include WordPress, PHP and plugin versions plus concise reproduction steps.
- Use fictional examples or redact personal information. Never send passwords, licence keys or a full database in a public request.
Need help? support@techinmedia.net · Support information